TABLE OF CONTENTS
- Business Logic
- Request resubmission of documentation
- Approve Student Verification
- Not Approve Student Verification, Convert to Full/In-Training Member
Business Logic
- User completes student application process.
- Student Verification Status gets set to "Pending Review".
- Student Verification Last Submitted gets populated with the current date/time.
- Contact record gets set to inactive via a job on CSI.
- User goes into Student Verification Pending Review Report.
- Staff member views file and decides to Approve, Not Approve, Request Reupload (Pending Submission).
- Approved
- Staff sets Student Verification Status as "Approved".
- Staff sets Student Verification Last Reviewed to current date/time.
- Staff sets Status to "Active".
- Not Approved
- Staff sets Student Verification Status as "Not Approved".
- Staff sets Student Verification Last Reviewed to current date/time.
- Staff changes the billing category to "In-Fellowship Training" if applicable.
- Request Reupload (Pending Submission)
- Staff sets Student Verification Status as "Pending Submission".
- Staff sets Student Verification Last Reviewed to current date/time.
- Automated email goes out letting them know they have 2 weeks to resubmit via Student Upload.
- Users will also be notified via the member portal with a link to the Student Upload page.
- On 7 days left and 1 day left a reminder email will go out.
- If they don't resubmit within the 2 weeks their subscription gets cancelled via a job on CSI.
- If they do resubmit their Student Verification Status goes to "Pending Review" and Student Verification Last Submitted Date gets updated with the current date/time.
- Approved
- Staff member views file and decides to Approve, Not Approve, Request Reupload (Pending Submission).
Request resubmission of documentation
Approve Student Verification
1. Click the Pencil icon in the Education section.

2. Set the Student Verification Status to Approved.

3. Set the Student Verification Last Reviewed Date to todays date/time.

4. Click the Save button.

5. Click the Pencil icon in the mini profile bar.

6. Set the Status field to Active.
7. Click the Save & Close button.

Not Approve Student Verification, Convert to Full/In-Training Member
1. Under the Education section of the contact record click the Pencil Icon.

2. Set "Student Verification Status" to "Not Approved".

3. Set the "Student Verification Last Reviewed Date" to todays date.

4. Click the "Save" button.

5. Click "Subscriptions"

6. Click "Student and Resident Membership"

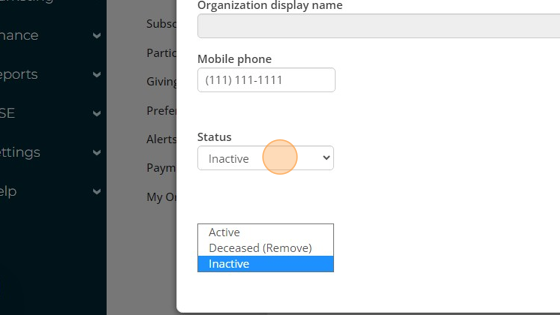
7. Click "Status" dropdown and set to "Inactive".
8. Click the "Paid through" field and clear out the date.

9. Click "Save & Close".

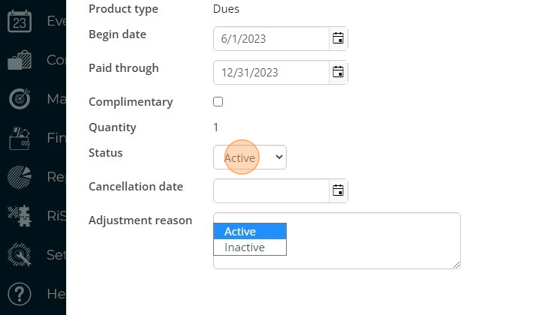
10. Click the Pencil Icon under the "Membership Details".

11. Clear the "Paid through" field on a new member or revert to the previous year if they were a member prior.

12. Clear the "Renewed through" field on a new member or revert to the previous year if they were a member prior.

13. OPTIONAL STEP FOR In Fellowship Trainee. Change the "Billing category" to "In Fellowship Training".

14. Click the "Save" button.

15. Refresh the browser.
16. Click the "Join Now" button.

17. Click "FULL MEMBER"

18. Select the appropriate dues amount.

19. Click "Add to Cart" button.

20. Click "Proceed to Checkout" button.

Was this article helpful?
That’s Great!
Thank you for your feedback
Sorry! We couldn't be helpful
Thank you for your feedback
Feedback sent
We appreciate your effort and will try to fix the article